To make your life easier, we created this Domi&Hoi Events List spreadsheet: http://bit.ly/2ZAURS1
Add our Domi&Hoi EVENTS Calendar to your personal calendar and make your planning even easier.
We’ve written very simple to follow step-by-step instructions for you below.
Select Your Instructions
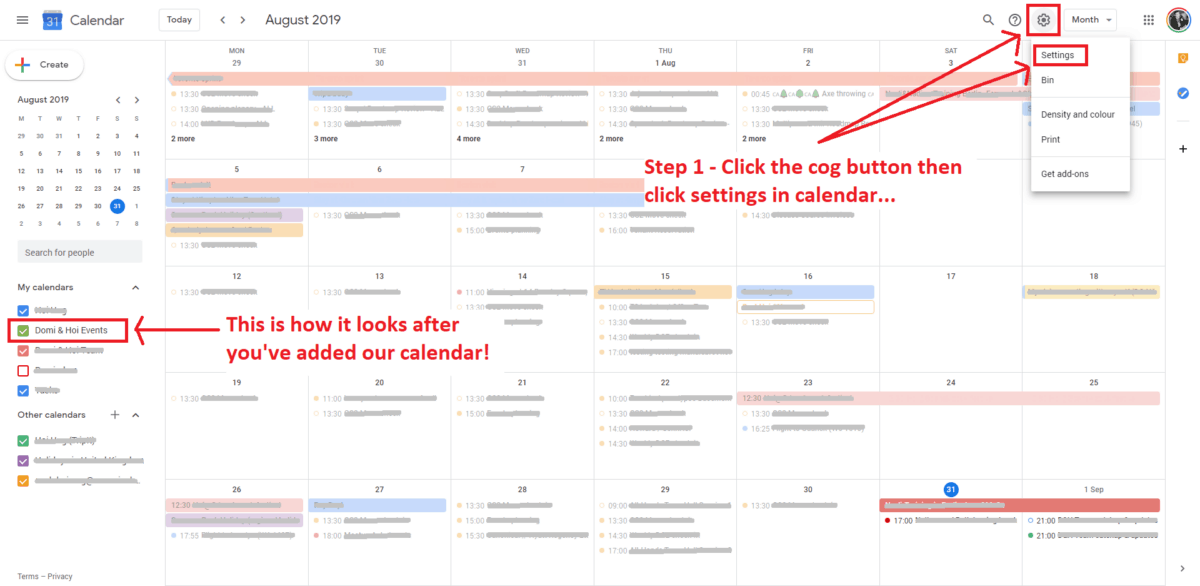
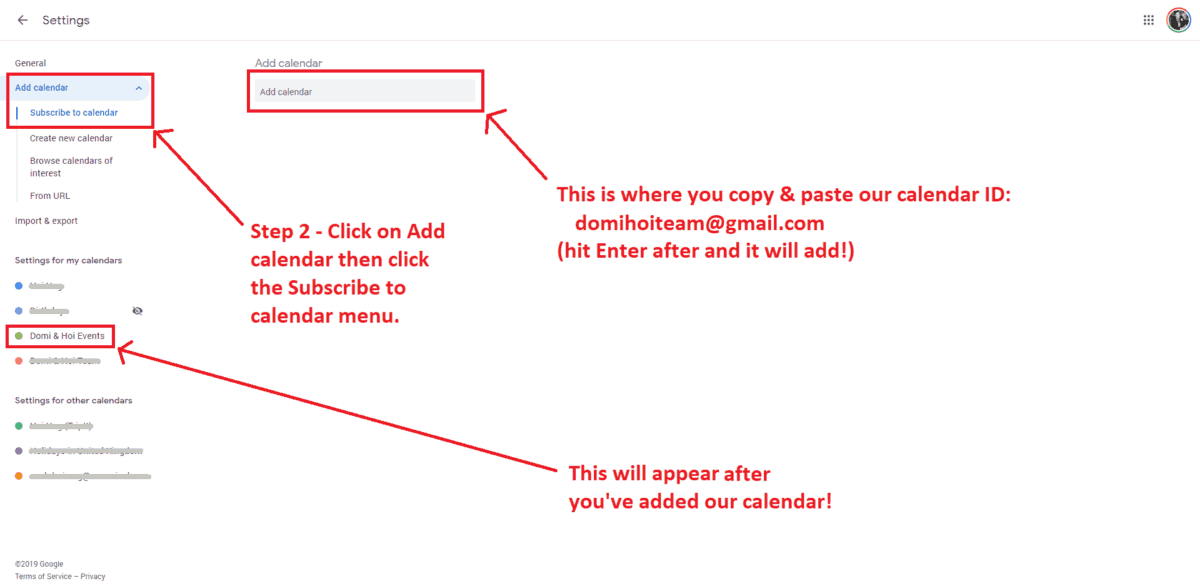
Add to your Google Calendar
By adding this on your desktop web browser, it should also automatically sync to your Google Calendar on Android devices.
Follow the instructions below and copy & paste either one of these should work:
Calendar ID
[email protected]
Public Address in iCal Format
https://calendar.google.com/calendar/ical/domihoiteam%40gmail.com/public/basic.ics
Add to your Outlook Calendar
Step 1
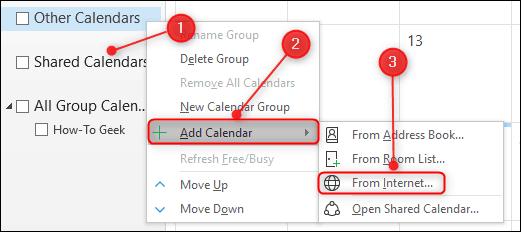
Open Outlook, and go to your calendar. Right-click the “Shared Calendars” option and then select Add Calendar > From Internet
Step 2
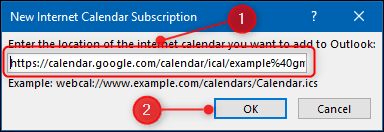
Copy & Paste Domi&Hoi EVENTS calendar public iCal address below into the text box and then click “OK.”
https://calendar.google.com/calendar/ical/domihoiteam%40gmail.com/public/basic.ics
Step 3
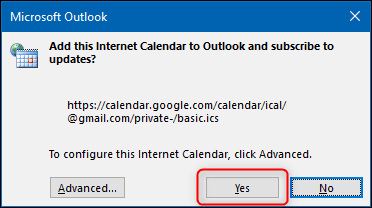
In the confirmation window, click “Yes.”
Step 4
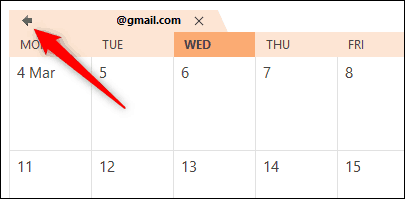
And that’s it; your Google Calendar will now be displayed in Outlook. You can overlap it with your calendar—just like you can with any other shared calendar—by clicking the arrow on the tab.
Step 5 – End
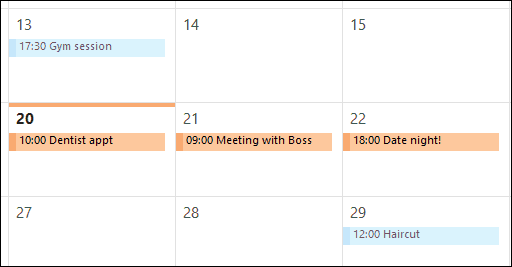
And now you can see both your PERSONAL and Domi&Hoi EVENTS calendars, with the appointments in different colours, in one place.
Whenever we add a new event into our calendar, it will automatically show you the dates to help you with planning your holidays and travels! Time saving and useful 🙂
Add to your Calendar on MacOS
Step 1
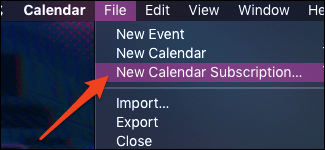
Open the Calendar app from the Dock or your Applications folder. From the main window, you can add a new calendar subscription by choosing File > New Calendar Subscription from the top menu bar, or by pressing Option+Command+S.
Step 2
Copy & Paste Domi&Hoi EVENTS calendar public iCal address below into the text box ‘Calendar URL‘ and then click “OK.”
https://calendar.google.com/calendar/ical/domihoiteam%40gmail.com/public/basic.ics

Step 3
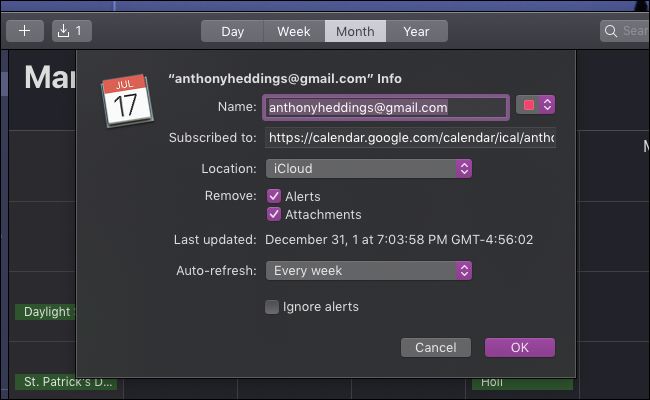
If it works, you should see this screen with the subscription settings. You can type into the ‘Name‘ field:
Domi&Hoi EVENTS
Step 4 – End
The main things to note here are the name you’d like it to be called in the Calendar app and how quickly it will sync with your Google Calendar. The default is once a week, but you can make it refresh every five minutes (or not at all). You can also change the color of the events with the dropdown next to the name.
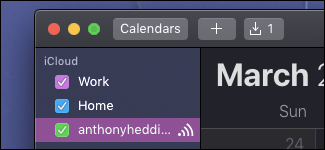
Press “OK” once you’re done changing the settings. If everything worked, you’ll see a new checkbox in the sidebar and new events on your calendar.
You can toggle this to show and hide the subscription.
Add to your Calendar in iOS 11
Step 1
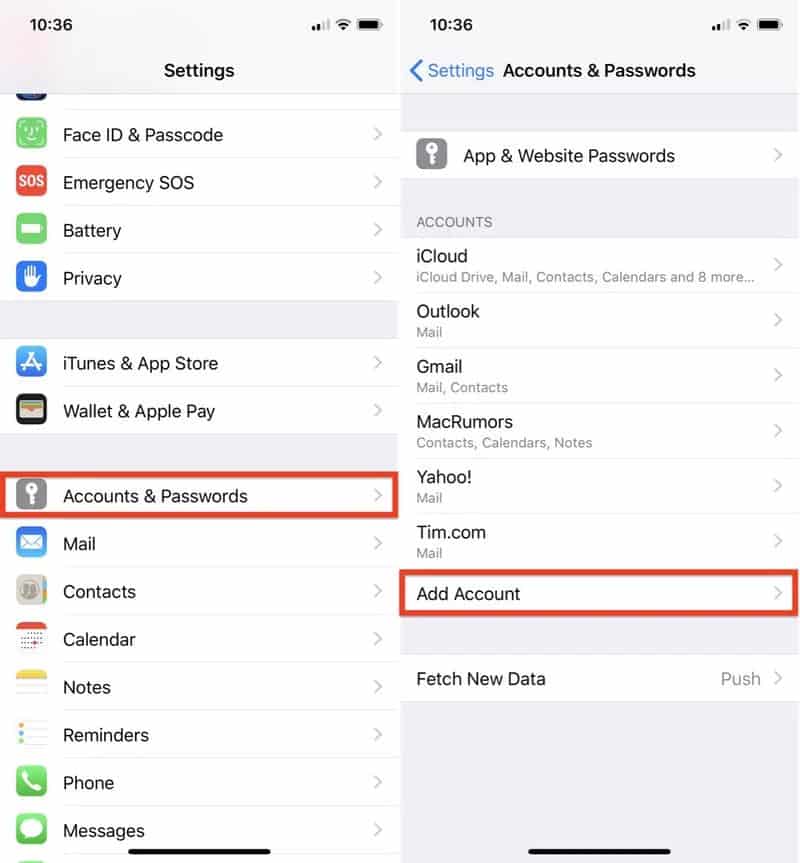
Launch the Settings app on your iPhone or iPad.
Tap Accounts & Passwords.
Under the Accounts section, tap Add Account.
Step 2
Tap Other.
Under Calendars, tap Add Subscribed Calendar.
Type in your calendar link in the Server field; to paste in a copied link, tap and hold the field and select Paste.
Copy & Paste Domi&Hoi EVENTS calendar public iCal address below into the Server field:
https://calendar.google.com/calendar/ical/domihoiteam%40gmail.com/public/basic.ics
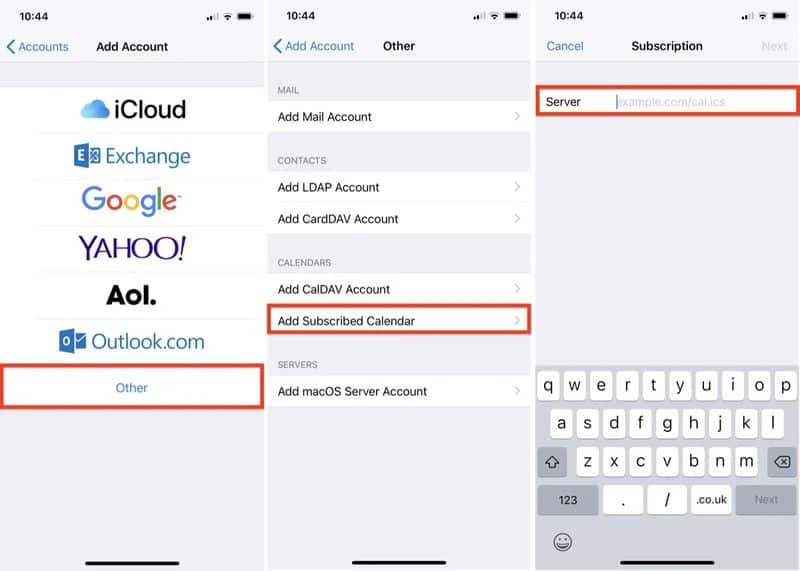
Step 3 – End
Tap Next.
Use the Description field to give the calendar an easily recognizable name. We suggest:
Domi&Hoi EVENTS
Enter a server username and password if required (most users will be able to skip this step).
Tap Save.
Special Thanks
Many thanks to the following resources which I borrowed some of their instructions & images, collated and modified for our use:
